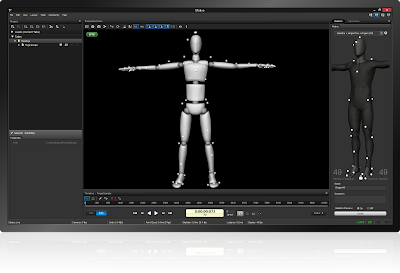
Adding lights to the scene was a similar process to what I did with the cameras, where I
was able to just drag the light from the asset browser straight into the scene. when Luke demonstrated the different settings for the lights, we tested it out and started to get the hang of it, but we didn't get too into detail on each of the lights settings. But I managed to learn the basics of how to apply a light to the scene. My scene is blocked out but I didn't emphasize any lights in my scene. I just tried out the lights and checked out how they work.
Mocap
Saturday, 7 December 2013
cameras
After blending tracks and fine tuning the animation I played around with the cameras which I added to the scene from the asset browser under elements. I was able to select any camera from the navigator to view its settings.
Each cameras placement was adjusted in the scene. By switching views to camera just like in Maya, I was able to see through the camera and make the adjustments.
Luke demonstrated how to create shots by inserting a shot track in story and dragging cameras in. So I created a camera sequence with different shots, I adjusted the lengths of each shot depending on the action of the character by dragging the ends of the shots in the timeline.
I got the idea of how cameras are established in motion builder but there is obviously alot more there then what I just learnt.
animating in motion builder
First we had to plot the character in motion builder the process involved transferring the animation from our take to James our 3D character model.
Adding layers for animation helped with key framing but after Luke showed us how to use story I found it was more efficient. In the story panel i was able to insert a character animation take with the current animation. this made it easier to see your animation in the timeline. Adding a character additive track helped with the clean up. the clean up process was simple and I managed to clean up the animation making the movements more subtle.
Tuesday, 29 October 2013
Motiv 1.5
Motion capture software
With this software we were able to see the actors performance being captured live. The actor performed actions which were directed to him. My shot involved the actor having to stand still, waiting alone, staring down and later becoming surprised by an acquaintance. For better performance we added props, a pencil was a key prop in my scene. Adding props made the actors performance more believable especially when he was required to use a walking stick in one of the scenes. The performance was being captured through Motive, but the props weren't visible on screen. So applying the props would be done during our editing and animation clean up process.

As a director I needed to explain to the actor the actions which needed to be performed. I was able to make it more clear for the actor once I spoke closely with him. The experience of directing was something new. I'm not usually comfortable telling people what to do, but this experience was beneficial as I was able to capture the required sequence for our short film.
After gathering all the shots verifying and processing them through motion builder. We cleaned up the footage of any gaps where markers were lost. With this were able to apply a character onto the skeleton and export the tracks and skeleton. The whole process was simple and everything we captured was exceptional.
With this software we were able to see the actors performance being captured live. The actor performed actions which were directed to him. My shot involved the actor having to stand still, waiting alone, staring down and later becoming surprised by an acquaintance. For better performance we added props, a pencil was a key prop in my scene. Adding props made the actors performance more believable especially when he was required to use a walking stick in one of the scenes. The performance was being captured through Motive, but the props weren't visible on screen. So applying the props would be done during our editing and animation clean up process.

As a director I needed to explain to the actor the actions which needed to be performed. I was able to make it more clear for the actor once I spoke closely with him. The experience of directing was something new. I'm not usually comfortable telling people what to do, but this experience was beneficial as I was able to capture the required sequence for our short film.
After gathering all the shots verifying and processing them through motion builder. We cleaned up the footage of any gaps where markers were lost. With this were able to apply a character onto the skeleton and export the tracks and skeleton. The whole process was simple and everything we captured was exceptional.
System & SetUp
All motion capture activity takes place in the capture
volume. This is the area view-able by the motion capture cameras.
But before we bring in the actor we first identify the capture volume using the volume opti wand which defines the cameras capture volume. We then identified the floor using the calibration square which has markers the cameras pick up. The floor is then seen on the grid in the view-port of the software.
Motion is tracked by the system by bouncing light off
reflective markers placed on the actor who is wearing the required suit. The markers
help identify the skeleton on the body. It
is also important when placing the markers correctly on the body if not it may
cause some problems.
But before we bring in the actor we first identify the capture volume using the volume opti wand which defines the cameras capture volume. We then identified the floor using the calibration square which has markers the cameras pick up. The floor is then seen on the grid in the view-port of the software.
When we began to setup the system with the motion capture
cameras and hubs we checked for any unwanted reflective surfaces or objects. To
minimize distortion, we remove all metallic like objects from the capture area
for a better result. The hubs which connect all the cameras had unwanted
flickering lights which were being read through the hard ware motive’s camera
views. So we covered those lights up. This way no unwanted flickering of light
will interfere with the markers placed on the actor. After doing all that we
were ready to begin shooting.
Mo-Cap in Movies
Motion capture for movies and film has
become progressively popular. It has been used in more and more films such as Iron
Man, The Lord of The Rings Trilogy. One film which stuck out the most was Avatar
a film produced by James Cameron. Avatar
takes motion capture a step further, allowing the director and camera crew to
directly film real-time motion capture. Motion capture has seen to be great for creating content for movies.
I really enjoy being able to experience using the system first hand, motion capture for animation can be a key tool. As an animator motion capture never came to mind, but I realized there is so much that can be done with motion capture that can be extremely useful for animation.
I really enjoy being able to experience using the system first hand, motion capture for animation can be a key tool. As an animator motion capture never came to mind, but I realized there is so much that can be done with motion capture that can be extremely useful for animation.
Motion Capture Experience
Motion capture can capture and model motion in 3 dimensions,
the system is very useful for capturing performances for animation and film. I
find the system very productive, capturing fluent movement in real time speeds
up the process of animating by hand. It
also gives animators a starting point for their animation, where they can edit
any changes to a performance through motion builder or Maya after a capture
session.
When we first set up the motion capture equipment we made sure all the cameras were positioned correctly. I was able to use the optical wand to help pick up data for the cameras. The wand has three markers which the software can identify. So I waved the wand in the space we created for the cameras. Movement of the wand allowed the cameras to pick up as much information as they can to fill their viewing frame which we can see on screen. Each camera view was filling with streaks of colored light, the effect was really nice.
So we managed to prevent as much distortion as possible and began shooting Juan who was our actor for the day. The markers on his suit were being picked up reasonably good except for his feet which the software had trouble picking up. Other then that the set up of the space was good but a couple of the cameras still had some problems with the bones. Glitching was happening as Juan was stepping closer to the outer circle of the capture volume. So we played it safe and had Juan act more in the center of the space. The experience was different, I learnt how motion capture is set up and and how it all works. Overall experience was great.
Subscribe to:
Comments (Atom)


.jpg)

